Content found in this wiki may not reflect official Church information. See Terms of Use for more information.
LG Standard TV Interface - Setup Guide
From TechWiki
Jump to navigationJump to search
Information Sheet:
Before Unboxing
- Take a photo of the Wi-Fi Mac address on the side of each display box
- Tag each box with the room name so the CNM info will show the right display in the correct room
- Login to the Church Network Manager (CNM)
- Add each display to the group policy for NoSplash
- Be sure to add the device name
** Setup Guide Video Walkthrough: https://youtu.be/7MRD7TXP7Sc **
Network: Step 1
- Take a photo of the Wi-Fi Mac address on the side of each displays box
- Mark each box with the room name so the CNM info will show the correct display in the respective room
Network: Step 2
- Login to the Church Network Manager (CNM )
- Add each display to the group policy for NoSplash
- Be sure to add the device name
Unboxing and TV Setup
- Once the displays are added to NoSplash, you can install the displays
- Unbox and set all manuals and extra parts aside
- Physically mount the display in place
- Turn the display on and follow the next few steps
-Please take your time and make sure you enter this information correctly
Setting up the LG Display: Step 1
- Power on the TV and it will boot to a [Welcome to LG’s First Use Wizard] page
- Select solution settings [Normal Configuration]
- Click [Start] and the TV Configuration options page will load
Setting up the LG Display: Step 2
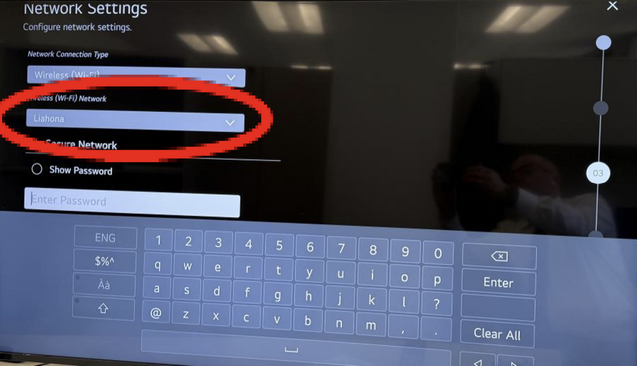
- Select [Network Settings]
- Select the [Liahona] Wi-Fi SSID and enter in the password (alma3738)
- Once connected to Wi-Fi select the [Back] button
Setting up the LG Display: Step 3
- The Back button will take you to this screen
- Select "Standard Pro:Centric Server Settings"
- Select [Next]
Setting up the LG Display: Step 4
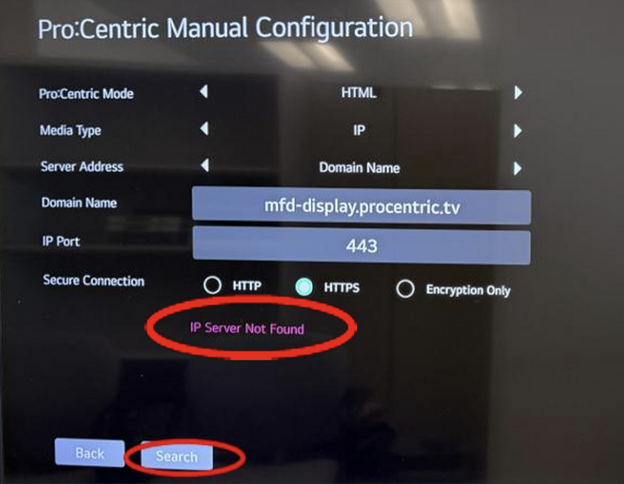
- Verify fields and Input domain name
-Domain Name: mfd-display.procentric.tv
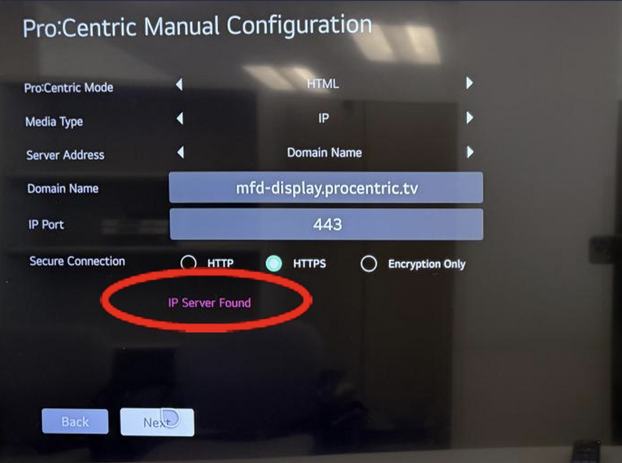
- Click [Search] and you will see "IP Server Not Found", this will change to "IP Server Found"
- Click [Next]
- *If the IP server is NOT found:
- The Display was not added to NoSplash in CNM
- The Manual Configuration was entered incorrectly
Setting up the LG Display: Step 5
- After the file is downloaded, the TV will cycle and then power off. You can select Reboot if needed
- Reboot may help as the TV will turn back on once it has loaded the file. If you let it power off, you may wait some time before you can turn it on.
Setting up the LG Display: Step 6
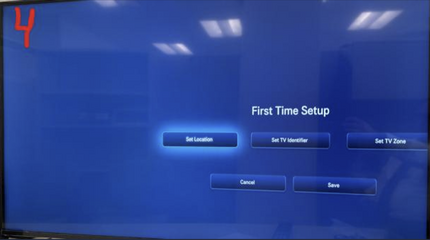
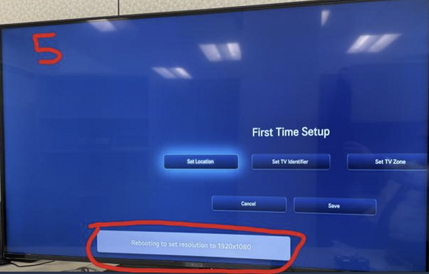
- After the display is done rebooting to set resolution to 1920 x 1080 you will see the Fist Time Setup Page.
- Set Property number
- Set Room Name
- Set TV Zone
- See Zone Setting 2-3
First Time Setup: 1
- Step 1- Enter in 7-digit Property Number using the on-screen keyboard.
- Step 2- Enter Room Name
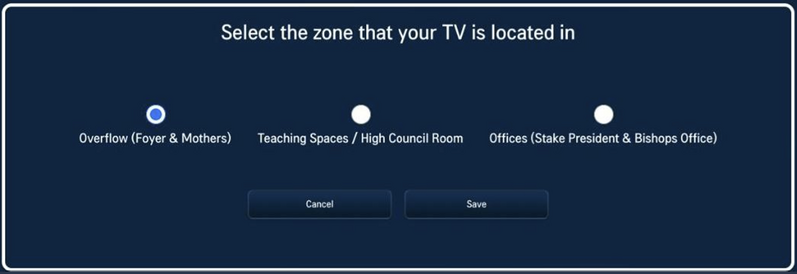
- Step 3- Select Zone
- Overflow (Foyer & Mothers) NOT used yet. This is currently a test page
- Teaching Space/High Council Room
- Offices (Stake President & Bishop Offices)
First Time Setup: 2
- Once all info is added, it will look like this
- After all building info is added, click [Save]
Welcome to LG Standard TV Display
Zone Settings: 1
- Overflow (Foyer and Mothers Room)
- This is for future use and will have buttons enabled for members to select developing functions.
- Please do not set any displays to this zone... Yet
Zone Settings: 2
- Teaching Spaces/High Council Room
- Most displays will be set to the Teaching Spaces Zone, features include:
-HDMI Input
-Chapel Overflow (in development)
-Link to "Come Follow Me" curriculum
-Screen Sharing
-Apple Airplay
-Google Cast
-Bluetooth Audio
Zone Settings: 3
- Offices (Stake President and Bishops)
- HDMI Input
- Link to General Handbook
- Screen Sharing
-Apple Airplay
-Google Cast
-Screen Share
- Bluetooth Audio
- After clicking the Casting Help, this page will pop up
- Click on each button for the respective help screen
Setup Menu
- There is a set up menu that is used to make changes to the display after the first time set up
- To access the setup menu, use the remote and press the up button followed by 9,8,7
- The top left corner shows current information of the display
- This will be the first thing to check if there is any issues


